+86 18513032986


How to Set a Timer Light Switch: Full Step-by-Step Guide
Admin 2026-07-13Content
- 1 Set a Timer Light Switch in Under 10 Minutes: The Short Answer First
- 2 Why Timer Light Switches Became a Standard Fixture
- 3 Types of Timer Light Switches and Where Each One Fits
- 4 Step-by-Step: Programming a Standard Digital 7-Day Timer Switch
- 5 Manual Override, Random Mode, and Vacation Settings
- 6 Wiring Basics: Load Type, Neutral Wires, and Switchgear Compatibility
- 7 Matching a Timer Switch to the Fixture: A Buying Checklist
- 8 Setting Up a Smart Wi-Fi Timer Switch Through an App
- 9 How Much Energy and Cost a Timer Switch Actually Saves
- 10 Maintenance, Battery Replacement, and Expected Lifespan
- 11 Troubleshooting: Why a Timer Switch Won't Hold Its Schedule
- 12 Frequently Asked Questions
- 12.1 Do I need an electrician to install a timer light switch?
- 12.2 Can a timer switch control a 3-way circuit with two switches?
- 12.3 Why does my timer switch keep losing the correct time?
- 12.4 How many on/off events can one timer switch store?
- 12.5 Is a smart Wi-Fi timer switch more reliable than a standalone digital timer?
- 12.6 Can a timer switch be added to circuits fed from switchgear rather than a standard panel?
Set a Timer Light Switch in Under 10 Minutes: The Short Answer First
To set a timer light switch, press and hold the program or "P" button until the display flashes, use the up and down arrows to set the current day and time, confirm with the set button, then add one or more on/off events by entering the hour, minute, and AM/PM or 24-hour value for each. Most in-wall digital timer switches save the schedule automatically once you stop pressing buttons for a few seconds, and the switch will begin following that schedule from the very next matching time slot. The entire process takes about five to eight minutes on a typical 7-day programmable model, and the steps below cover mechanical dial timers, digital 7-day timers, and smart Wi-Fi timer switches, along with the wiring and switchgear compatibility questions that trip up most first-time installers.
This guide goes well beyond the basic button sequence. It walks through every timer family sold today, the exact wiring differences that decide whether a timer will even power on correctly, how commercial-scale timing works when the load sits behind switchgear rather than a simple wall box, what actually drives the energy savings numbers manufacturers advertise, a full troubleshooting section organized by symptom, a buying checklist for matching a timer to a specific fixture, and a long FAQ covering the edge cases that come up again and again in real installations. Read it top to bottom once, and every future timer switch in the house becomes a five-minute job instead of a guessing game.
Why Timer Light Switches Became a Standard Fixture
Timer light switches did not start as a convenience feature. The earliest widely sold residential units were spring-wound mechanical devices built primarily for security — giving an empty house the appearance of occupancy by switching a porch or living-room lamp on and off at fixed times. That single use case, deterring opportunistic entry, is still the reason building codes in a number of jurisdictions require timed or occupancy-based control on exterior lighting for multi-unit residential buildings and commercial storefronts.
Over time three additional drivers pushed timer switches from a niche security accessory into a mainstream fixture found in a large share of homes and nearly all commercial lighting circuits:
- Rising electricity costs made "lights left on by accident" a measurable line item worth eliminating with a one-time hardware purchase
- LED adoption reduced the load per fixture enough that inexpensive digital timer switches could be rated for a wide range of bulbs without overheating
- Home Wi-Fi becoming near-universal made app-based scheduling and remote override financially viable for mass-market switches rather than only expensive building-automation systems
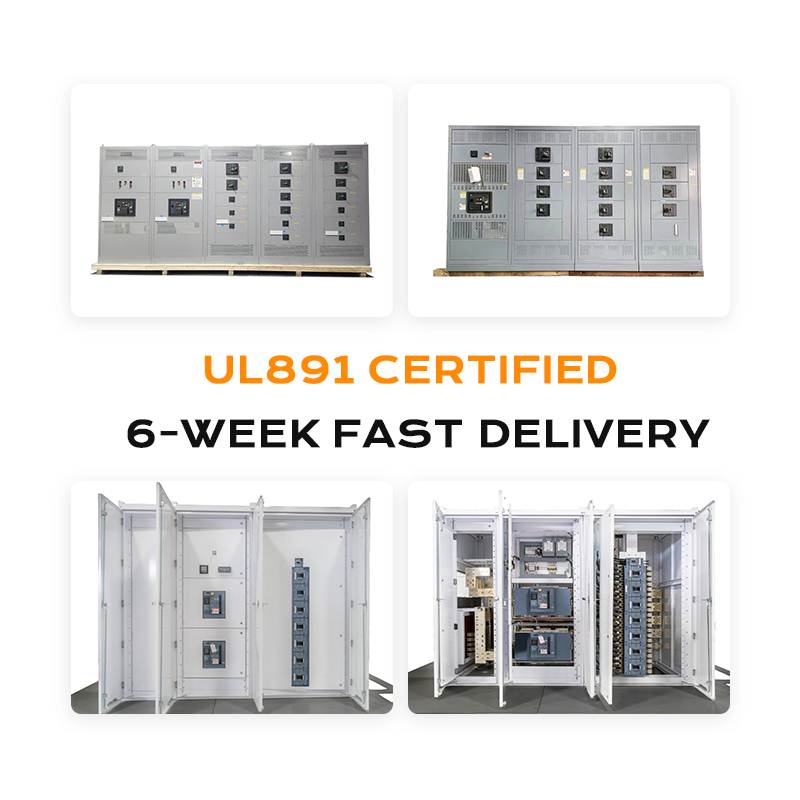
Commercial and industrial facilities followed a parallel but separate path. Rather than dozens of individual timer switches, larger sites consolidate scheduling into a small number of time-clock modules sitting inside the switchgear that already distributes power to those circuits, which keeps maintenance, override, and fault diagnosis centralized in one enclosure instead of scattered across a building.

Types of Timer Light Switches and Where Each One Fits
Before programming anything, it helps to know which category of timer switch is mounted on the wall, because the button layout and the menu logic differ quite a bit between families.
Mechanical Dial Timers
These use a rotating 24-hour dial with small plastic pins or tabs. Pushing a pin in marks a 15 or 30-minute block as "on." There is no digital display, no battery backup, and no day-of-week distinction — the same schedule repeats every single day.
Digital 7-Day Programmable Timers
These have an LCD screen, a handful of buttons (Prog/Set, Clock, Up, Down, Manual On/Off), and let you assign different schedules to different days or day groups such as weekdays versus weekends. Most residential in-wall models sold since the early 2020s fall in this category.
Smart Wi-Fi Timer Switches
Configured entirely through a phone app rather than physical buttons, these connect to a home Wi-Fi network and allow schedules, sunrise/sunset offsets, geofencing, and voice assistant integration. The wall-mounted hardware still needs correct wiring, but the "timer setting" itself happens in software.
Panel-Mounted Timers for Switchgear and Commercial Circuits
In commercial or light-industrial settings, timer functions are frequently built into or paired with switchgear assemblies rather than a single wall switch. A time clock relay sits inside or beside the switchgear enclosure and controls contactors that switch entire lighting circuits, parking lot floodlights, or building facades. Programming logic is similar in concept to a digital timer switch, but the device usually mounts on a DIN rail and interfaces with the switchgear's control wiring rather than a standard wall box.
Plug-In Timer Modules
Rather than replacing the wall switch at all, a plug-in timer sits between the outlet and the lamp cord, controlling whatever is plugged into it. These are the fastest option to set up since there is no wiring involved, but they only work for plug-in loads such as lamps, not hardwired ceiling or wall fixtures.
| Type | Programming method | Battery backup | Typical cost range |
|---|---|---|---|
| Mechanical dial | Push pins into a rotating dial | None | Lowest of the five |
| Digital 7-day | Faceplate buttons and LCD menu | Capacitor or coin cell, hours to days | Moderate |
| Smart Wi-Fi | Phone app | Schedule stored locally on device | Highest of the five |
| Switchgear time clock | Digital keypad or rotary dial on the module | Internal battery or capacitor, days to weeks | Varies with amperage rating |
| Plug-in module | Small buttons or a mini dial on the plug body | None to minimal | Lowest of the five |
Step-by-Step: Programming a Standard Digital 7-Day Timer Switch
This sequence matches the button logic used by the large majority of in-wall digital timer switches on the market, including most that ship without a printed manual.
- Locate the Set or Prog button, usually the largest button on the faceplate or hidden under a small flip-down cover.
- Press and hold it for two to three seconds until the day-of-week indicator starts blinking.
- Use the Up/Down or +/− buttons to set the current day, then press Set again to move to the hour field.
- Repeat for hour, minute, and AM/PM (or confirm 24-hour format if the model uses one) until the clock matches the current time exactly.
- Press Set once more to enter the event-programming screen, which will show "ON1" or a similar label.
- Select which days this event applies to (individual days, Mon–Fri, Sat–Sun, or all seven), then set the on-time.
- Press Set again, switch to "OFF1," and repeat the process to set the matching off-time.
- Add additional ON/OFF pairs if the schedule needs more than one cycle per day, then exit the menu by pressing Set and holding, or by leaving the switch untouched for 10–15 seconds so it times out and saves.
Once saved, most timers display a small icon (a clock, a bell, or the word "AUTO") confirming that automatic mode is active rather than manual override.
Setting a Mechanical Dial Timer Instead
Mechanical dial timers use an entirely different, and in some ways simpler, method. Rotate the dial by hand until the small arrow or notch lines up with the current time on the printed 24-hour ring. Then push in every plastic tab that corresponds to a time block when the load should be on; leave the remaining tabs pulled out for off periods. Because there is no day-of-week logic, the same on/off pattern repeats every day until the tabs are physically rearranged.
Setting a Switchgear-Mounted Time Clock
A DIN-rail time clock inside a switchgear enclosure is programmed the same conceptual way as a digital wall timer, but the interface is usually a rotary dial with trippers (mechanical versions) or a small keypad with a numeric display (digital versions). For a mechanical tripper-style unit, rotate the dial to the current time, then push the ON trippers down for each interval the circuit should energize, leaving OFF trippers up for the rest. For a digital DIN-rail unit, the day/time/event sequence mirrors the wall-switch steps above almost exactly. Because these modules sit inside live switchgear, the breaker feeding that section should always be locked out before opening the enclosure to reach the module, and any wiring changes belong to a licensed electrician.
Manual Override, Random Mode, and Vacation Settings
Every digital timer switch includes a way to bypass the schedule temporarily without erasing it, and understanding this button prevents the most common support call: "the timer stopped working."
| Mode | What it does | Typical use case |
|---|---|---|
| Auto | Follows the saved weekly schedule | Everyday operation |
| Manual On | Forces the load on until switched back to Auto | Guests staying late, cleaning crews |
| Manual Off | Forces the load off, ignoring the next scheduled on-event | Daytime maintenance, bulb changes |
| Random / Vacation | Shifts each on/off event by a random 10–30 minutes | Making an empty home look occupied |
| Astro / Sunset offset | Calculates local sunrise/sunset and offsets the event by minutes you choose | Porch and landscape lighting, smart Wi-Fi models |
After a manual override, most switches automatically return to Auto at the next scheduled event, but a few budget models stay in manual mode indefinitely until someone presses the Auto button again — worth checking after any override so the schedule doesn't silently stop running.
Wiring Basics: Load Type, Neutral Wires, and Switchgear Compatibility
A timer only works correctly if it's wired to match the load it controls and the panel or switchgear feeding it. Getting this wrong doesn't usually damage the timer, but it does cause flickering, buzzing, or a schedule that appears to "not save."
Neutral Wire Requirement
Most digital and all smart Wi-Fi timer switches need a neutral wire in the wall box to power the internal clock and Wi-Fi radio continuously. Homes wired before the mid-1980s in many regions often lack a neutral at the switch location, which is the single most common reason a new timer switch won't hold its programmed time.
Load Type
Timer switches are rated for specific load types — incandescent/halogen, LED/CFL, and motor loads such as fans each have different maximum wattage limits on the same switch. Installing an LED-rated timer on a 500-watt halogen fixture, or vice versa, can trigger relay chatter or premature failure.
Switchgear-Level Timing for Larger Circuits
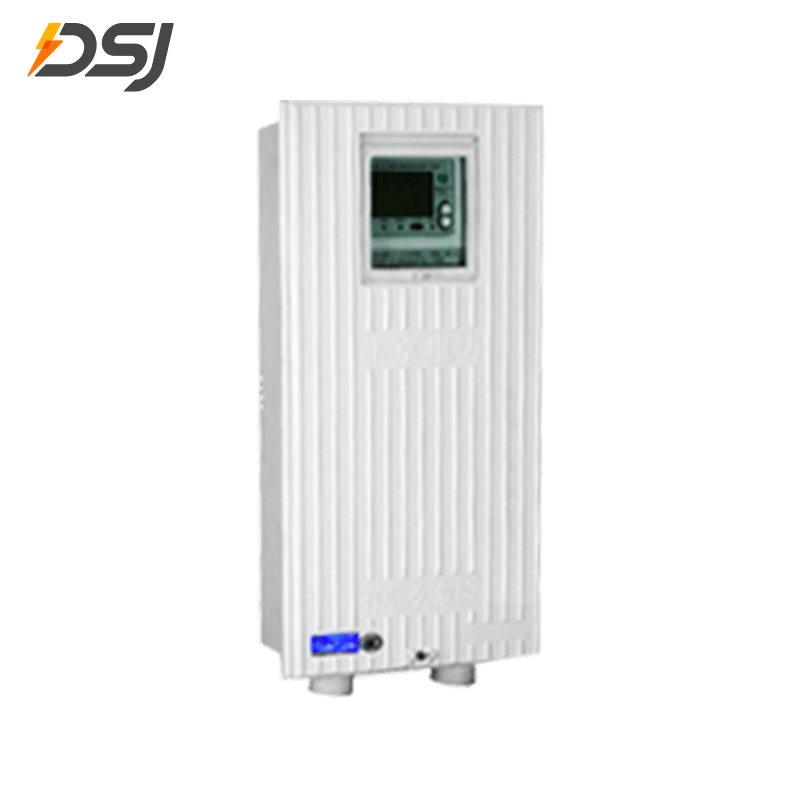
When a schedule needs to control an entire lighting circuit rather than a single fixture — a warehouse floor, a parking structure, or a row of building floodlights — the timer typically isn't a wall switch at all. Instead, a time-clock module is installed inside the switchgear cabinet and drives a contactor rated for the full circuit amperage. Programming that time clock follows the same day/time logic described above, but every wiring change should be handled by a licensed electrician because the switchgear enclosure carries the building's main or sub-main distribution.
| Feature | In-wall timer switch | Switchgear time clock |
|---|---|---|
| Typical load | One fixture or a small group, under 15A | Whole circuits, often 30A to several hundred amps via contactor |
| Mounting | Standard wall box | DIN rail inside the switchgear enclosure |
| Who installs it | Homeowner or handyman in many jurisdictions | Licensed electrician only |
| Programming interface | Faceplate buttons or an app | Rotary dial or digital keypad on the time-clock module |
Setting Up a Smart Wi-Fi Timer Switch Through an App
Smart timer switches move all the scheduling logic into a phone app, which removes the small-button fiddling but adds a network-connection step.
- Confirm the switch is wired and the breaker is back on; the switch's status light typically blinks to show it's ready to pair.
- Open the manufacturer's app, choose "Add Device," and select the switch model or scan its QR code.
- Join the switch to the home Wi-Fi network, almost always on the 2.4GHz band rather than 5GHz.
- Once connected, open the device's schedule tab and add on/off entries the same way as a digital timer — day, time, and repeat pattern.
- Optionally enable sunrise/sunset offsets, which pull local astronomical data rather than a fixed clock time.
- Save the schedule; most apps push it to the switch immediately, and the switch keeps running the schedule even if the home Wi-Fi later goes down, since the schedule is stored locally on the device.
A useful cross-check after setup: turn off the home router for a minute and confirm the light still switches at the next scheduled time. If it doesn't, the schedule saved to the cloud account rather than the device itself, and a firmware update usually resolves that.
How Much Energy and Cost a Timer Switch Actually Saves
The energy case for timer switches is straightforward arithmetic once the wattage and hours are known. A single 60-watt-equivalent LED porch light left on 12 hours a day instead of the 4 hours actually needed burns roughly 8 extra kilowatt-hours a month, which is a small but entirely avoidable cost that a $15–$30 timer switch eliminates in one programming session. Commercial facilities scale this same logic across dozens of fixtures on a single time-clock circuit, which is why a centralized switchgear-based schedule is common in parking structures and warehouses rather than relying on staff to manually flip breakers at closing time.
Where the Savings Come From
- Eliminating lights left on during unoccupied daytime hours
- Matching outdoor lighting to actual sunset/sunrise rather than a fixed guess
- Reducing bulb replacement frequency by cutting total run hours
- Avoiding the "forgot to turn it off" scenario entirely, since the schedule doesn't depend on anyone remembering
A Worked Example
Take a small retail storefront with 20 LED downlights at 12 watts each, currently left on 16 hours a day out of habit even though the store is only open 10 hours. Cutting the run time to 11 hours a day (open hours plus a one-hour buffer) removes 5 hours a day across 20 fixtures, or 100 fixture-hours daily. At 12 watts per fixture, that is 1.2 kilowatt-hours saved per day, roughly 36 kilowatt-hours a month, purely from a single time-clock schedule change at the switchgear level with no other equipment upgrade.
Maintenance, Battery Replacement, and Expected Lifespan
Timer switches are low-maintenance by design, but a handful of simple checks extend their working life and prevent the schedule from silently drifting.
Battery and Capacitor Backup
Digital timers that rely on a small internal battery, rather than a capacitor, typically need that battery replaced every 2 to 5 years depending on how often the circuit loses power. A battery low on charge often shows up first as the clock losing a few minutes a week before it fails outright, so a switch that seems to be running "slightly late" is usually giving an early warning.
Dust and Heat Buildup
Timer switches mounted in enclosed spaces, such as inside a cabinet or behind a decorative cover, run slightly warmer than an open wall-mounted switch. Keeping the faceplate vents clear of dust and avoiding tight enclosures helps the internal relay last through its full rated switching-cycle count.
Typical Service Life
- Mechanical dial timers: often 8 to 15 years, limited mainly by the motor that turns the dial
- Digital 7-day timers: commonly 7 to 12 years, limited by the relay's rated switching cycles and battery life
- Smart Wi-Fi switches: hardware often lasts a similar 7 to 12 years, though software or app support may end sooner
- Switchgear-mounted time clocks: frequently rated for 15+ years given their industrial-grade components, though the contactors they drive may need earlier servicing
Troubleshooting: Why a Timer Switch Won't Hold Its Schedule
Clock Resets After a Power Outage
Mechanical dial timers with no battery backup lose the current time instantly during any outage, and the dial itself doesn't move, so the whole schedule shifts by however long the power was out. Digital models with a backup capacitor or battery usually hold time through short outages (typically a few hours) but reset after a multi-day outage.
Schedule Saves but Doesn't Trigger
This is almost always one of three causes: the switch is stuck in Manual mode, the AM/PM setting is inverted on one of the events, or the load type doesn't match the switch's rated load, causing the internal relay to refuse to close.
Timer Buzzes or Flickers the Bulb
A faint buzz or a dim glow when the switch is "off" usually points to an LED-rated timer being paired with an incompatible dimmable LED bulb, or a load below the switch's minimum wattage threshold. Swapping to a non-dimmable LED bulb rated for the switch, or adding a small bypass capacitor sold by most timer manufacturers, typically resolves it.
Frequently Asked Questions
Do I need an electrician to install a timer light switch?
For a simple single-pole replacement in a standard wall box, many regions allow a confident DIYer to do the swap after shutting off the breaker. If there's no neutral wire present, the load is a ceiling fan or 3-way circuit, or the timer is feeding into switchgear-level distribution, hiring a licensed electrician is the safer and often legally required route.
Can a timer switch control a 3-way circuit with two switches?
Yes, but it requires a timer specifically labeled for 3-way use, since a standard single-pole timer will not integrate correctly with the traveler wires used in 3-way wiring.
Why does my timer switch keep losing the correct time?
This points to either a dying backup battery/capacitor inside a digital timer, or repeated short power interruptions on the circuit. Replacing the internal battery, where the model allows it, usually fixes persistent time drift.
How many on/off events can one timer switch store?
Most residential digital timer switches support 6 to 20 stored events per day, which is more than enough for typical use since most households only need one or two on/off cycles.
Is a smart Wi-Fi timer switch more reliable than a standalone digital timer?
Reliability is comparable for basic scheduling because the schedule is stored on the device itself, not solely in the cloud. The smart switch's advantage is remote control and sunrise/sunset automation, not a more dependable core timer function.
Can a timer switch be added to circuits fed from switchgear rather than a standard panel?
Yes, but at that scale the timing function is normally handled by a time-clock module mounted inside or beside the switchgear enclosure rather than a wall switch, and any wiring work on switchgear should go through a licensed electrician familiar with the specific equipment.
For exclusive deals and latest offers, sign up by entering your email address below.



 +86 18513032986
 FLC Center, Chaoyang District, Beijing, China
Copyright © DSJ Electrical Co., Ltd. All Rights Reserved
Power Distribution Equipment & System Manufacturer